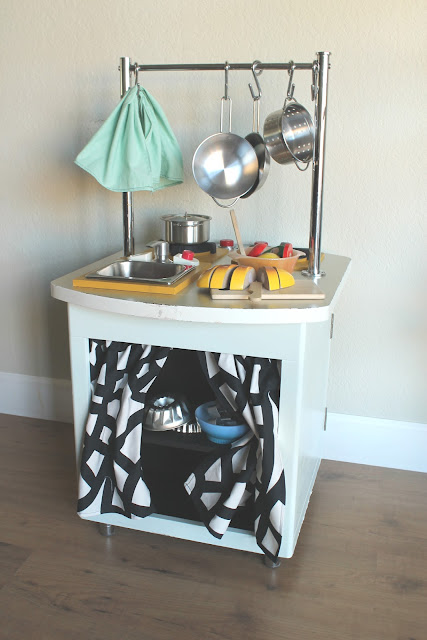
Since we are not quite at the budget line to gut and remodel our home kitchen (but maybe next summer, y'all!), to satisfy my kitchen reno urges I made over a beat up wood play kitchen for a very good friend.....well, her toddler daughter, that is. And, Here she is!! Not her daughter, the play kitchen.....
There is a pretty funny story behind this one. So, I'm on the look out for a wood play kitchen for my friend. This one pops up on Craigslist for $25. I send her the link and her hubby goes and picks it up. It's night time, he's tired from work, he hands the gentleman $25 (or was it $20?) for the play kitchen and lugs it home. Upon arrival and wife's inspection, to their dismay, the kitchen was in bad, very bad shape. We are assuming the seller put up a different photo for his listing, but whatever. I felt pretty awful sending them a rinkidy old kitchen link and went over to see the damage. The kitchen itself is really solid and very heavy. I thought it would be a fun, worthwhile fix. Here are some before pictures.
This thing was bad. Wood trim missing, broken knobs, and diiiirrrrty.
We start off by giving the whole piece a good scrub down. My two assistants below.
Next, I used some Klean Strip Liquid Sander and Deglosser which proved to be very useful for the laminate wood. Will definitely be using this product for future projects.
Next, I had an old can of Rustoleum spray primer that I wanted to finish off.
Now, I commissioned my dad to make a new wood surround for the sink with his fancy tools. Worked out like a charm. He also picked up an old sink soap dispenser and attached that as a play faucet. So resourceful, Dad.
A bunch of paint and glue annnndd.........Here is the new sink.
Another before. Plexi-glass was missing too.
I really love how the colors turned out. For the inside shelves and burners I used some left over black chalkboard paint. The wood trim is painted with a bit of leftover ocher yellow I had from a previous project. I scraped and spray painted all the knobs with Rustoleum apple red paint. And, the main surround is Sea Anemone by Martha Stewart. I love the scheme because it is really gender neutral which was a surprise. I actually thought it would look really girly, but it looks great in our more neutral decor. So, if down the road when my friend wants to donate or sell it to someone, it can be used for boys or girls.
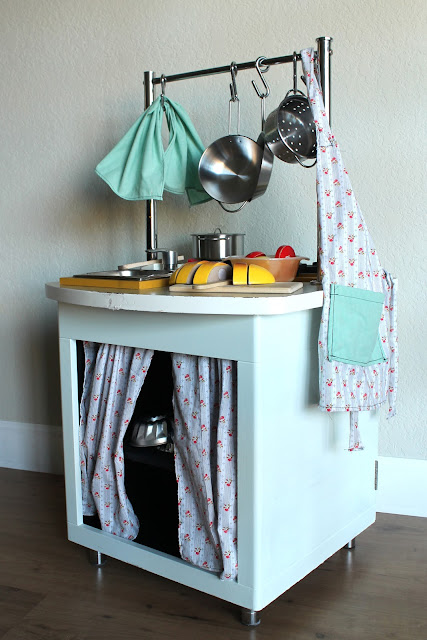
I actually made two sets of curtains. The black and white fabric is Ikea and I honestly just made those for the blog pics as the graphic black and white pattern stands out more than the original fabric I chose. The other curtains are below and you will know what I mean.
Here are the original curtains. These are what I based the whole color scheme upon. See what I mean about standing out in the pictures? They are super feminine and cute in person though. I also whipped up a little matching linen dishtowel and apron.
This was such a rewarding project. Each new step with this one I kept thinking, that there are but a few things in this life that are greater than seeing a work be completed before your eyes. Rewarding, indeed. Enjoy little, E. Miss Ashley loves you very much!
It is spring break and we have been crazy busy with projects, inside and outside the home. Coming up are a campaign side table and captain's chair redo. Also, some throw and euro pillow covers, twin duvets out of sheets and some monogramming! Wowza. Have a great weekend, Everybody.


1 comment:
Hey lady, I purchased a (little) kitchen that needs a makeover and is missing the faucet. Where did you find a replacement?
Post a Comment